Discover Your World in 3D, again

Monday, June 27, 2011

Today, we’re unveiling a totally redesigned Your World in 3D website. If you’re new to geo-modeling -- the term given to creating 3D buildings for Google Earth and Google Maps -- the Your World in 3D website has all the tools and info you’ll need to get up and running quickly. The new website showcases several examples of what fellow modelers are building and will help connect with other geo-modelers around the world.

So that’s the what, here’s the why. Five years ago, Google acquired a Boulder-based startup called @Last Software, which was making waves in the architectural world with their 3D modeling software, SketchUp. Google had an ambitious idea to add a 3D model of every building on the planet to Google Earth, and SketchUp was a tool up to the task. Not only that, by opening SketchUp to a wider audience, users would have the opportunity to help build a virtual mirror of their world.

Times Square showcases some of the very first user contributed models

Today, the 3D virtual world is in full bloom: hundreds upon hundreds of villages, towns, and cities have been added to the 3D map representing hundreds of thousands of 3D buildings from every corner of the globe -- truly, a testament to the power of open collaboration.

In the intervening half decade, we’ve introduced several new ways of adding buildings to the 3D map, including Google Building Maker and the Cities in 3D program. And you may have noticed 3D buildings surfacing on Google Maps and Google Maps for mobile as well. With so many different ways of creating and viewing 3D models, we realized we needed a destination that would demystify the process of geo-modeling,

Enter: the new Your World in 3D website. We call the website Your World in 3D because it is you, the user, who is helping build this virtual world, and perhaps more importantly, it is you who is finding innovative and surprising ways of using this data.

Your World in 3D has been redesigned from the ground up

Why geo-model? When asked, most geo-modelers say they do it because geo-modeling is just plain fun, but building your town in 3D can also be a great way to show civic pride and encourage tourism for your town. It can also provide an interactive way to promote your business or contextualize the urban planning. 3D modeling has also been used in crisis response situations as we saw in the grassroots modeling effort that happened after the earthquake in L’Aquila, Italy.


Why create 3D models for Google Earth?

We hope you’ll join us on this mission (and adventure) of building the most comprehensive 3D virtual mirror of planet Earth.

Happy modeling!

Posted by Nicole Drobeck, Geo Community Program Manager

Quick and dirty poché for sectional views

Thursday, June 23, 2011

While putting together a demo SketchUp file to use in our booth at the AIA National Convention last month, I worked out a nifty little technique that I think is worth sharing. Here’s hoping you think it’s nifty, too.

The problem I was trying to solve was this: SketchUp’s Section Plane Tool cuts away parts of a model to show sectional views, but it doesn’t “fill in” the spaces between wall surfaces, floor slabs and other areas that are intended to be solid in a design. Often, architects will blacken or hatch these interstitial areas to help their drawings read better. This filling-in is called poché, and SketchUp simply doesn’t offer an automatic way to do it.
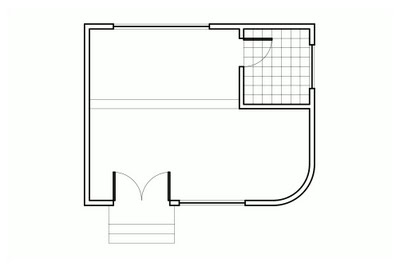
By default, SketchUp thickens section cut lines, but the spaces between the faces aren't filled in (above).
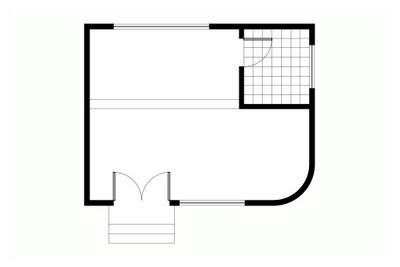
Sometimes, it's useful to show section cuts with solid shading.

I wanted the SketchUp file I was preparing to look "pochéd" no matter where it was sliced. Furthermore, I wanted that poché to carry over when the model was inserted into LayOut.

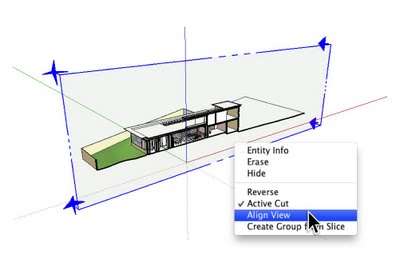
I started by using the Section Plane Tool to cut a section through the model (as seen below). I oriented my view to be perpendicular to the section cut by right-clicking the section plane object and choosing Align View. Since I wanted this to be a true, scalable orthographic view, I turned off perspective (Camera > Parallel Projection). Finally, I created a new scene; doing so made navigation easier, and was necessary for creating a viewport in LayOut later on.
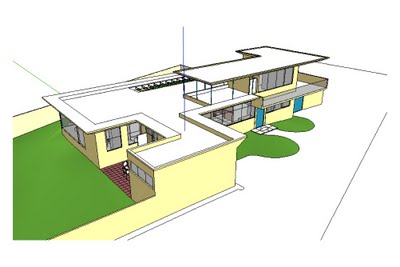
An overall view of the model

After adding a Section Plane, I right-clicked and chose Align View.
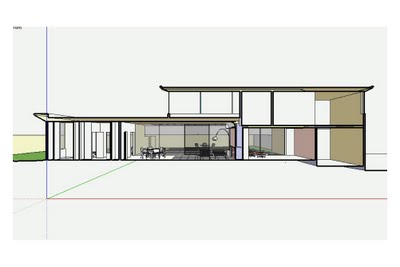
This is the right view of the model (above), but true orthographic projections don't include perspective.
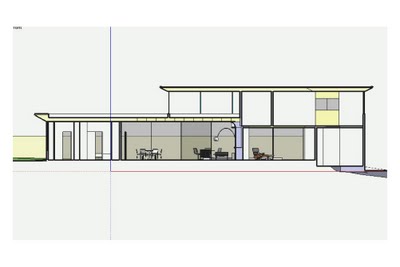
Choosing Camera > Parallel Projection from the menu bar turned off the perspective.

Now for some work with Styles: As this would be a black and white, sectional view, I chose to apply the HiddenLine style from the "Default Styles" collection that ships with every copy of SketchUp. This style uses thickened edges to indicate cut-through faces, but (as I mentioned earlier) it doesn’t fill in the areas between them. Perhaps more annoyingly, edges which exist beyond the section cut still show up in cut-through areas (see below). This is visually distracting and not at all acceptable for professional work. If I’d turned in drawings that looked like this in architecture school, my professor would’ve made me run laps around the studio.
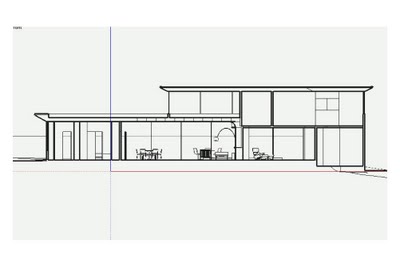
Applying the HiddenLine style turns the model black and white, but there are problems.
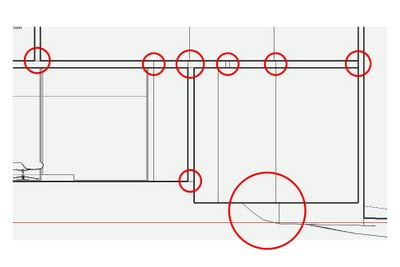
Edges which exist beyond the plane of the section cut are plainly visible. This isn't desirable.

Revelation #1: Monochrome is the answer

This helpful post from last year gave me the idea to use the Monochrome face style to automatically turn the “fronts” of my faces white and the “backs”, black. See the following image for a visual explanation of what I did.
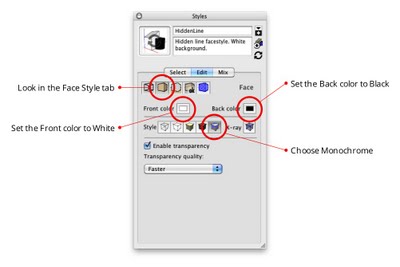
I selected the Monochrome face style and chose white and black for the default front and back face colors.

The above settings work well, except where faces are "inside-out".

Hmm. It was clear that I had a little cleanup work to do; some of my faces were oriented so that the back-side was facing out (above). To make it easier to see what I was doing, I changed the Back Color to something lighter than black, then spent a few minutes turning the offending faces right-side-out by right-clicking them and choosing Reverse Faces. I ended up turning off Section Plane object visibility (View > Section Planes) to make faces easier to select.

Temporarily changing the default Back color to yellow made it easier to see what I was doing.
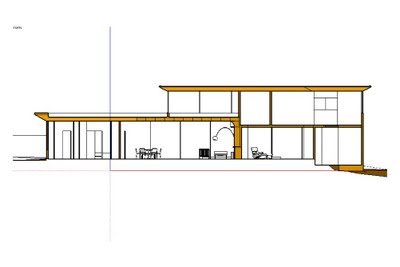
I spent a few minutes reversing the offending faces.
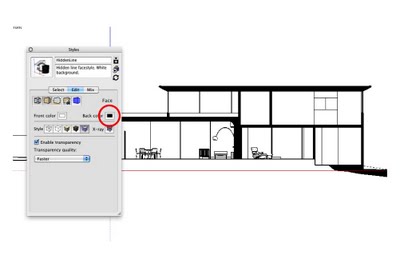
When I was done, I set the Back color back to black.

Revelation #2: Slim down section cuts

My next problem was easy to solve. The thickened-edge effect that makes section cuts stand out looked too heavy when combined with my newly-pochéd in-between areas, so I made them thinner. You’ll find this setting in the Modeling tab of the Styles dialog box (see below).
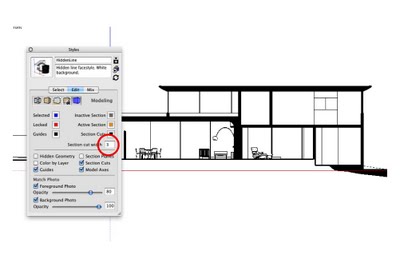
The default section cut thickness setting of "3" looks too heavy when combined with poché.

A setting of "1" looks much better.

Revelation #3: Hide Section Planes

While I was in this section of the Styles dialog box, I made sure Section Plane objects would never be visible when my style-in-the-making was applied. I deselected the Section Planes checkbox.

Uncheck the Section Planes checkbox while you're in this section of the Styles dialog box.

Revelation #4: Eliminate roundness shading

The next challenge I faced was a little trickier. In the following image, notice the shading gradient that defines the curvature on the underside of the Eames lounge? On a true, linework-only drawing, this shading wouldn’t be visible.
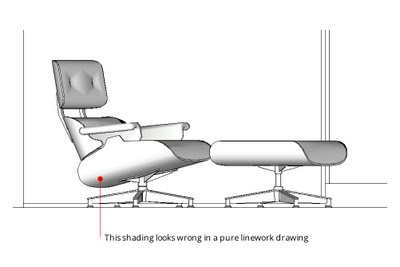
The shading in the above image looks nice, but it isn't appropriate for the drawing type I'm trying to create.

This shading is an automatic result of SketchUp’s built-in rendering engine. It’s usually very useful, but I wanted to get rid of it. After messing around for a few late-night minutes, I figured out how. The key is to do two things:

  • Turn on “Use sun for shading”. This tells SketchUp to use its shadow engine to render faces, even if shadows are turned off (which they probably should be).
  • Move the Dark slider all the way to the right. A setting of 100 for Dark means that shadows basically aren’t visible. This eliminates all curve shading in your model.
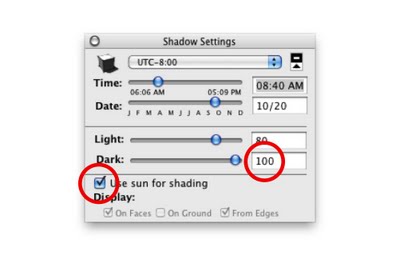
Turning on "Use sun for shading" and setting the Dark value to 100 effectively eliminates roundness shading.
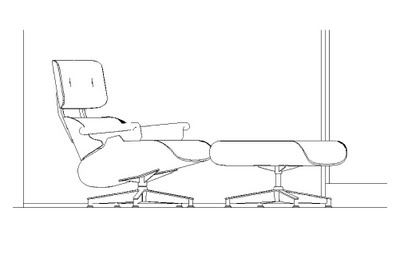
Having removed the shading, I'm left with pure black and white linework.

Revelation #5: Set Profiles to "1"

In keeping with my earlier discovery of the benefits of setting my Profile thickness to “1” (instead of “0”), I did so. This allowed curved, multi-faceted surfaces to appear outlined without making the boundaries of every group and component in my model look too thick. The images below show the before and after. Much better.
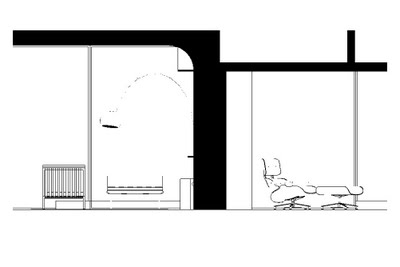

With Profiles turned off altogether, some rounded objects aren't visible.
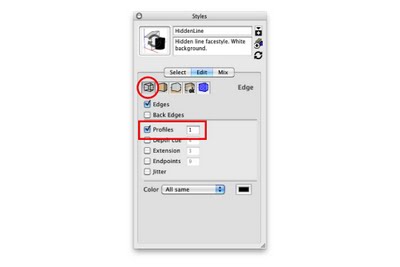
Control Profile settings in the Edge section of the Styles dialog box.
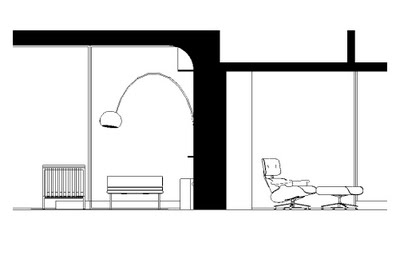
With Profiles turned on and set to "1", rounded shapes like the lamp on the left are clearly visible.

One more thing

I wanted a nice, thick base for my house to sit on, so I modeled one. Since the base was hollow, the poché trick worked here as well.
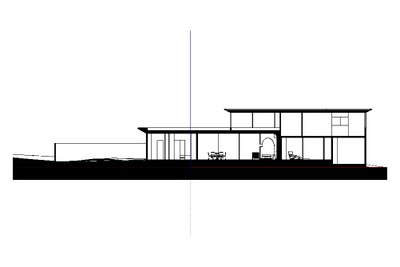
I added a thick base to the model.

When everything was set, I created a new style and called it "Section Cut". With this style applied, things looked just the way I wanted them to, no matter where I cut through my model.
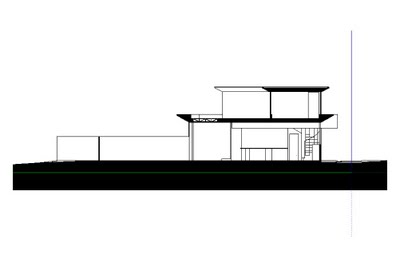
Short section through the same building
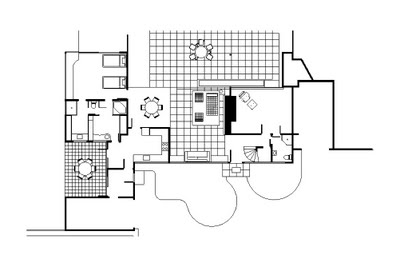
The poché trick works just as well on plan sections.

Real-time design with SketchUp

Wednesday, June 22, 2011

Guy de Lijster is a designer from the Netherlands who works with the IBI Group in Portland, OR on transit-related architecture, like light rail, subway and bus stations, and occasionally even bridge design.

I’ve really enjoyed working with SketchUp since I was introduced to it in 2007 while working at Otak. I especially appreciate that SketchUp allows me to model in real-time which is a feature I use in meetings with clients, stakeholders and other consultants on the design teams. A few years ago a colleague of mine, Gary Hartnett, started using SketchUp in meetings as a tool to both “wow” the client and to educate them regarding the possibilities and constraints tied to different design options.

This capability came in handy on a project we were working on with Community Transit in Everett, WA to design concepts for a series of Bus Rapid Transit (BRT) Stations. After our first workshop, we came out with a couple of concepts which we refined and presented using SketchUp. One of these concepts ended up being built as close as possible to the original design. By modeling and presenting in SketchUp, the client felt ownership over the design and had a better understanding of the challenges associated with construction. Initially, they wanted something “wavy” or “fluid”, but using SketchUp, it was effective to show that a two-directionally curved canopy is not terribly easy to build, especially with a limited budget and a tight schedule.

3 options developed for BRT stations. The bottom option was built in 2010.

Later in 2007, we designed a Pedestrian Bridge in Tempe, AZ at the Town Lake. In meetings with the client, the engineer T.Y. Lin International, and the artist Laurie Lundquist, it was highly effective to present proposed concepts for the bridge directly from SketchUp using a laptop and a projector. This allowed the team to engage in real-time with the bridge concepts and study the relationship with the neighboring Tempe Center for the Arts, which was a sensitive issue for this design. The viewpoints at the different piers of the bridge were easy to visualize using a series of Scenes in SketchUp. The model also allowed real-time analysis of aspects like transparency, visibility and shading. I then created a rendering of the bridge using Adobe Photoshop, which was helpful in creating the reflection in the water.

SketchUp was also a great tool to do shading studies for consideration of different shading structures. A shading sail, developed together with local artist Laurie Lundquist, integrated with the flow of the bridge and proved elegant and functional.
Toward the end of the design process, SketchUp actually played one more unique role. While I was determining the right angle for the 2 bridge arches to touch each other at the top of each arch in SketchUp, the 2 arches suddenly overlapped (as I was working within the component, both arches were turning simultaneously), and voila, a unique crossing arch appeared, which we introduced as our preferred alternative. Today, the bridge is currently under construction.

A shading study

The bridge under construction

As recently as a couple of weeks ago, I used Match Photo for the first time in a meeting with a prospective client for station design and design of alignment options for another Bus Rapid Transit (BRT) line. I created just one model to demonstrate 3D modeling, show 3D sections of the streetscape and show a Match Photo context study.

Different configurations for street lanes

By switching Layers on and off and clicking on saved Scenes, we were able to show how future transit oriented development (TOD) would positively impact the streetscape. The different lane options were also placed in different Layers and Scenes, so we could show their respective impact with one click on the Scene tab. At the request of the client I was able to change the station configuration in real-time, which translated immediately to the Match Photo Scenes.

BRT station renderings

I want to conclude by saying what I appreciate most about Sketchup is that it’s highly intuitive and quick enough that it enables real-time modeling, which is a real asset in presenting and shaping public projects that usually include a significant amount of community engagement.

We'd like to thank Guy for sharing his story with us. More of his firm's beautiful renderings can be found in this album or by downloading this pdf.

Posted by Chris Cronin, SketchUp Pro Sales

Design an improvement for your vehicle, win a 3D printed prize

Thursday, June 16, 2011

Speaking of Personal Manufacturing, our fast-moving friends over at i.materialise have devised a new 3D printing competition for SketchUp modelers everywhere. The Google SketchUp and i.materialise Pimp Your Vehicle Challenge invites you to design an add-on, attachment or other accoutrement that would improve the transportation mechanism of your choice. Cars, bikes, motorcycles, pogo sticks—designs that would upgrade any mode of transit are all fair game. As an example of one such real-world object, consider the doohickey pictured below: It lets you attach a GPS device to the handlebars of your bicycle.

Judges from i.materialise and the SketchUp team will pick first, second and third-place winners. First prize gets his or her design 3D printed on a Zcorp multicolor printer and a SketchUp Pro 8 license. Perhaps even more interestingly, the engineers and product development people at i.materialise will work with the first-place winner to try to make the winning design a commercial reality.

Check out the official competition page for more details. The deadline for entries is July 14th, 2011. Good luck!

More Building Maker cities and a new competition, too

Tuesday, June 14, 2011

It’s a great day for the citizens of Argentina -- and for Canadians in the nation’s capital. We’ve released new Building Maker imagery in six new cities:
  • Buenos Aires, Argentina
  • Córdoba, Argentina
  • Mar Del Plata, Argentina
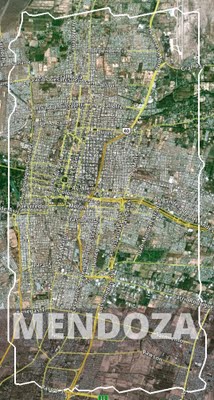
  • Mendoza, Argentina
  • Rosario, Argentina
  • Ottawa, Canada

...but that’s not all! To help these cities get modeled, we’re having the first ever modeling competition for Building Maker. Starting tomorrow -- June 15th, 2011 -- you can create models in these six cities to win prizes in two different categories: Best Model and Most Models. The first place prize is a GPS-enabled digital camera; second place is a Building Maker shirt; and third is a Google travel mug. Have fun!


A special tour of the U.S. Green Building Council's headquarters

Thursday, June 9, 2011

You could call our friends at Igloo Studios “multi-taskers”. While they mainly concentrate on creating products and plugins for designers and architects, they also have a podcast, a SketchUp training program and a popular book.

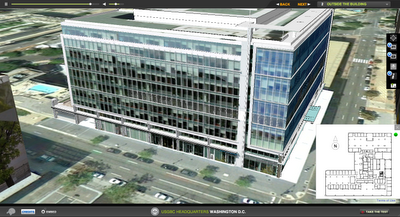
Their latest project is a virtual tour of the U.S. Green Building Council’s headquarters in Washington, D.C. (Note: you’ll need the Google Earth plugin installed to view).

This project is cool for lots of reasons. For starters, USGBC’s 75,000-square-foot facility is loaded with efficient and innovative green features that have earned the building a LEED Platinum rating. Professionals regularly tour the USGBC for real-world examples of successful green practices.

USGBC headquarters

However, not everyone has the luxury of being able to visit Washington DC, so Igloo Studios built this one-of-a-kind Google Earth tour of the building. Using a custom instance of the Google Earth plugin and building product catalogs from the 3D Warehouse, Igloo was able to create a tour of both the exterior and interior of the building!

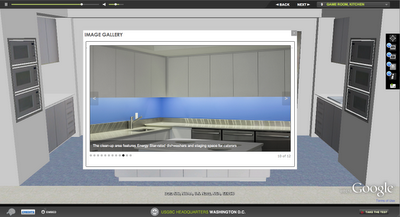
The tour features interactive elements

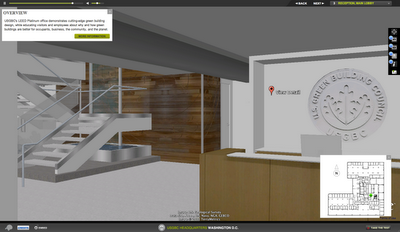
As you navigate through the 3D building, you’ll notice it’s jam-packed with other goodies like a guided audio tour, photos and embedded videos. You can even click on the building’s materials and products to learn more about the green tech used in its construction.

Once you finish the tour, you can launch a test that will earn you the same continuing education credits that you would get for taking the live tour.

And the coolest feature of all: if you find a building product during the tour that might be useful in one of your projects, you can download it directly into your SketchUp design!

Learn about building materials and then bring them into your model

If you're interested in learning more about how your products or buildings can be visualized in this way, be sure to send Igloo an email. Posted by Chris Cronin, SketchUp Pro Sales

Westport, Ireland: The Town of Tomorrow

Wednesday, June 8, 2011

Westport, Ireland has been holding the Town of Tomorrow competition for a few years now. As the name implies, the competition is about designing a futuristic version of Westport town with Google SketchUp. For this year’s competition, we flew out to Ireland to train students in basic SketchUp modeling techniques.

Students experimenting with SketchUp.

After the training, students spent two and a half months developing their visions of what Westport should look like in the future. We then selected winners based on how innovative, creative, and practical the design was. Many of the students incorporated themes of green technology, renewable energy, and sustainability into their projects.

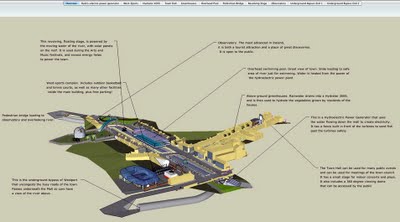
The winning design from the Electric Spoon Parade team!

This year’s winning design came from the Electric Spoon Parade team and was based predominately on the use of converting the town’s canals to hydroelectric power generators. There were also other water catchment systems set up around the town to collect rain water for greenhouse use and filtered for consumption at a newly designed sports complex. Other important attributes include an underground bypass for automobile traffic and a pedestrian bridge.

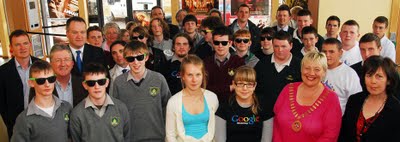
Photo courtesy of Conor McKeown

We held a celebration to announce the winners and awarded everyone a variety of fun Google gear, notably the sweet shades the participants are sporting in the photo above. The Town Council of Westport also generously provided gift cards to all the members of the winning teams.

Westport may be a small town in Ireland, but it has some big ideas on how to become the Town of Tomorrow! Posted by Nicole Drobeck, Geo Community Program Manager

Partyin' in 3D in Serbia

Thursday, June 2, 2011

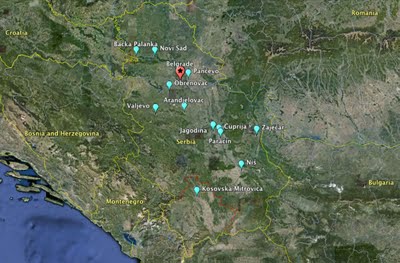
Supermodeler Zeljko Zdravkovic, known as zexland on the 3D Warehouse, recently hosted a modeling party in Belgrade, Serbia. A modeling party is a workshop/conference hybrid designed to bring people from around the community to learn about geo-modeling and make models of a specific area. Zeljko invited both experienced modelers and soon-to-be modelers from cities all around Serbia: Belgrade, Novi Sad, Niš, Arandjelovac, Pančevo, Paraćin, Zaječar, Obrenovac, Valjevo, Bačka Palanka, Kosovska Mitrovica, Ćuprija and Jagodina!

People from all around Serbia attended the event in Belgrade.

Two other talented modelers also made the trek from their respective homelands to share their modeling insights with the group, Bruno Redureau from France (3DCité) and Mano Papanikolaou from Greece (}-M@No->).

The first day of the event was spent covering the basics, but the real fun started on the second day when we took a tour of the city and specifically of Skadarlija, the bohemian district of Belgrade. Here you find many small shops and restaurants on the cobblestone streets are made up of watermelon-sized rocks. We took photos of the area to use later to create photo textures for future models.

Ironically, Bruno from France was the first to complete a model in Skadarlija! (“Restaurant Zlatni Bokal”)
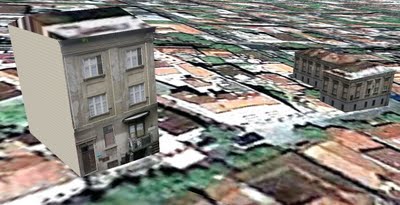
Stevan Suklovacki from Belgrade takes the lead, however, with two models already created!(“Stambeni objekat u Skadarskoj ulici” & “Zgrada u Skadarskoj ulici”)

In addition to learning modeling techniques and asking questions, the group shared stories with each other about their own geo-modeling projects, all the while sampling delicious Serbian finger-food. Fellow Serbians were able to meet one another in person, and put a face to a 3D Warehouse name.

Ready to model!

Srdjan Vidakovic, an avid Google Map Maker and Panoramio user, helped document the second day’s activities. View more photos of the event and watch Belgrade grow in 3D.

If you’re interested in having a modeling event in your town too, find out how! We’d love to help you get your town on the 3D map! Posted by Nicole Drobeck, Geo Community Program Manager