Announcing SketchUp 8 M5, now in a dozen languages again

Wednesday, December 19, 2012

SketchUp's new product icon, now translated in 12 different languages!

We’re closing out the year with one final maintenance release for SketchUp 8. We’ve fixed the usual collection of bugs and fiddly performance whatnots for everyone (see the Release Notes for all the details) but we’ve also rebuilt all our localized versions again as well. If you’re using SketchUp 8 in English, French, Spanish, Italian, German, Japanese, Korean, Simplified or Traditional Chinese, Russian, Dutch and Brazilian Portuguese... we have a new build for you today.

Happy End-of-Year-Holiday to you all!


Posted by John Bacus, Product Manager

Christmas snowfalls with breeze for Blogger 2012

Monday, December 17, 2012

Christmas snowfalls with breeze for Blogger 2012
Christmas is one of the largest festival celebrate all over the world. Christmas is the much awaited festival that knock the door of all Bloggers. And all are thinking about decorating their blog. How to decorate the blog with snowfalls and clouds ? Do you like to decorate your blog with beautiful snowflakes and clouds? Then here there is a article about how to add snowflakes with breeze to your blogger blog.

If your Blog has a dark interface then this widget serves better.The Snow flakes and the breeze are  in white color so dark background will be better to get a good look.


If you want to get dark Christmas background ,set the following picture or search darker Christmas backgrounds.
Do you want to know how this work
Click below to view the demo


/*-- Breeze for Snow flakes --*/
#mbl_snowflakes {
position: absolute;
height: 950px;
width: 966px;
overflow: hidden;

}
#snowContainer > div
{
position: absolute;
width: auto;
height: auto;
-webkit-animation-iteration-count: infinite, infinite;
-webkit-animation-direction: normal, normal;
-webkit-animation-timing-function: linear, ease-in;
}
#snowContainer > div > img {
position: absolute;
width: auto;
height: auto;
-webkit-animation-iteration-count: infinite;
-webkit-animation-direction: alternate;
-webkit-animation-timing-function: ease-in-out;
-webkit-transform-origin: 50% -100%;
}
@-webkit-keyframes fade
{
0% { opacity: 1; }
95% { opacity: 1; }
100% { opacity: 0; }
}

@-webkit-keyframes drop
{
0% { -webkit-transform: translate(0px, -50px); }
100% { -webkit-transform: translate(0px, 650px); }
}
@-webkit-keyframes clockwiseSpin
{
0% { -webkit-transform: rotate(-50deg); }
100% { -webkit-transform: rotate(50deg); }
}


@-webkit-keyframes counterclockwiseSpinAndFlip
{
0% { -webkit-transform: scale(-1, 1) rotate(50deg); }
100% { -webkit-transform: scale(-1, 1) rotate(-50deg); }
}

  •  Search <body and copy the following below it
<script charset="utf-8" src="https://netoopscodes.googlecode.com/svn/branches/Js files/snowfall.js" type="text/javascript"></script>

<div id="mbl_snowflakes">

<div id="snowContainer">

</div>

</div>


  • You are done... Save the Template

New Book: Architectural Design with SketchUp

Thursday, December 13, 2012

Back in March of 2011, when Wiley (a publisher of many books about SketchUp, including my own) asked me to review Alex Schreyer's proposal for a new title, I jumped at the chance. Alex's outline was mouth-wateringly full of promise; aimed squarely at architects and other designers, he promised not to spend hundreds of pages teaching the basics. Instead, he focused on aspects of SketchUp that were a) not well covered by existing books and b) very, very interesting to millions of experienced SketchUp modelers everywhere.

The completed volume does a beautiful job of presenting material that devoted SketchUppers badly want to learn, but which isn't very easy to explain. Put it this way: I'm pretty good at SketchUp, and in the hour or so I've been thumbing through Alex's book, I've learned about 50 things. I can't wait to read the thing from cover to cover.

Architectural Design with Sketchup is organized into four main sections—these are actually listed in the book's subtitle: component-based modeling, plugins, rendering and Ruby scripting. I'll talk about each in turn.

Component-based modeling

This section of Alex's book is a great primer for using groups and components to build assemblies of objects. The thinking here is that by modeling every element of a complex construction—the example he uses is a foundation/floor detail—you're effectively "building" your design before you actually build it. You save time and money and therapy sessions by making your mistakes digitally, and you end up with a better design. This isn't exactly a new concept, but Alex does a terrific job of providing concrete guidance for how to do this kind of modeling; it's the detailed how that's missing from most other resources. Other aspects of component-based modeling that Alex fails to shy away from: building dynamic components, applying materials and generating reports that list every part in your design with SketchUp Pro.

Using plugins effectively

One place where even accomplished SketchUp modelers stumble is in identifying the plugins that might help them do their work. There are zillions of plugins out there, but before this book, no one had assembled a comprehensive, alphabetical listing of dozens of the most popular, most useful extensions. Not only does Alex list them; he also provides a good, brief description of what each is for. This is the section of Alex's book that I'll study most carefully—it might even be the source of inspiration for a few posts on this blog.

Photo-realistic rendering

Admit it: If you're not already an avid renderer, you've at least thought about how nice it would be to master that particular skill. But where to start? There's never been more choice in renderers, and everyone knows that rendering is a lot more complicated than just clicking a button and waiting a few hours. The settings, presets, lighting environments and other widgets that go along with making a halfway decent rendering require an indecent amount of background knowledge. It's half science and half craft. With Alex's book in hand, I think we all might finally have a shot at learning this stuff.

Another thing I should mention: This book is 100% in color. If you think that makes a big difference when you're trying to learn about rendering, you'd be 100% correct. I wish my book was in color...

Scripting

Here's where things get a little wacky. When I saw in Alex's proposal that he intended to include an entire section on scripting, I thought, "Ruby for designers? Did Alex mix up his medications?" I was pretty dismissive about the whole idea in my feedback to Wiley.

Well, it's a good thing I was wrong. Twenty months later, it's a different world, and being able to read and write simple code has never been more important. In teaching the fundamentals of Ruby scripting, Alex intelligently focuses on using scripts to generate forms that are otherwise arduous or impossible to model in SketchUp. He doesn't assume you want to create entire standalone plugins; this is really just about using the power of algorithms to make stuff when you can't think of any other way to do it. The material is by no means easy, but Alex deserves a world of credit for making it as easy as possible.

I recommend this book without hesitation to anyone who really wants to be able to make SketchUp do everything it's capable of doing. It's clearly written, well-illustrated and comprehensive. And the icing on the cake: There's a companion website where you'll find sample files and a direct line of communication with the author. Buy this book and take the first step toward becoming a more useful person.

A recap of SketchUp 3D Basecamp 2012

Wednesday, December 12, 2012

Almost two months ago, hundreds of the world's most dedicated SketchUp aficionados descended upon our hometown for 3D Basecamp 2012. On the first day, we packed into the Boulder Theater for presentations from the SketchUp management team, several plugin developers and a keynote by Bre Pettis of MakerBot.
The first day of Basecamp took place at the historic Boulder Theater.

 
Leaders from SketchUp and Trimble talk about what's in store for our product. They address such questions as "What's next for SketchUp?" and "Why did Trimble buy SketchUp?". (46:14)

 
The SketchUp leadership team takes questions from the 3D Basecamp audience. (17:06)

 
Representatives from seven SketchUp photo-realistic rendering plugins outline their product offerings in rapid succession. (17:07)

 
Four very different companies present their SketchUp-related technologies: BuildEdge, Sunglass, Product Connect and 4D Virtual Builder. (56:57)

 
 MakerBot Industries co-founder Bre Pettis delivers a terrific keynote presentation about 3D printing. (31:35)

That night, we gathered at a local spot for a party, where the highlight was undoubtedly the SketchUp ShootOut: two heroes competing to make the audience guess a mystery word by modeling on side-side computers. Bulldozer! Cabin! Bubble tea! Melancholy! The winning guesser and the winning modeler both won free drinks, but everyone seemed to be having a blast. Note: I beat John in a best-of-five match with "glove", "foyer" and "cook". It may be the proudest I've been all year.

Hotshot modelers squared off against each other in the first-ever SketchUp ShootOut.

Tuesday's proceedings moved to yet another venue for a full day of barely-contained mayhem. The morning's three blocks of unconference sessions coincided with three hours of beginner Ruby training. After lunch, we squeezed together to watch scheduled presentations by the likes of Daniel Tal, Nick Sonder, Mark Carvalho, and teams from 3skeng, ARmedia and SightSpace 3D. Three more hours of unconference sessions and a repeat of the morning's Ruby 101 class followed, then everyone went straight to bed. I assume.

 
Landscape architect and author Daniel Tal presents a wide-ranging set of tips, tricks and best practices for modeling everything from terrain to site design. (40:31)

 
Architect and video tutorial star Nick Sonder outlines his process for using SketchUp Pro and LayOut to create complete sets of construction documents for his projects. Note: We subsequently made a set of six videos with Nick that describe his process in detail. They're easier to watch and understand than this recording—just an FYI. (52:06)

We planned a Design Charrette for Day 3; participants split up into teams to tackle a challenge that we created in collaboration with Impact on Education, a local non-profit that acts as a kind of R&D department for the Boulder Valley School District. The design brief involved re-imagining a classroom to take into account the way teaching and learning have evolved with the introduction of mobile technology. At the end of the two-and-a-half hour charrette, a dozen teams presented their designs (in SketchUp and LayOut, of course), after which an illustrious panel of judges from IoE picked their favorite projects. The winning team members then squared off against each other for several rounds of SketchUp trivia. The victorious Michaels (Tadros and Brightman) each won a Replicator 3D printer, generously donated by our friends at MakerBot Industries.

While the designer-types did their thing, about twenty plugin authors spent Day 3 across the street at our first-ever Ruby Developers' Conference. They huddled and schemed and plotted the future of our API (application programming interface). They even held a competition of their own: Dale Martens, a.k.a. "Whaat" and the creator of the Artisan organic modeling tool set, won the hackathon by coding a working first-person shooter game that runs inside SketchUp—in a couple of hours. Needless to say, Dale got a MakerBot, too.

Participants in Wednesday's Ruby Developer Conference posing as if they're a sports team.

All in all, we're pretty proud of how well our first Basecamp at Trimble went, considering how quickly we planned it and that Dusty (our Event Manager extraordinaire) isn't on the SketchUp team anymore. The space was at times tight and A/V and internet access are forever thorns in my side, but the vast majority of attendees we surveyed said they enjoyed themselves, learned some things, met cool people and (most tellingly) would happily join us at another 3D Basecamp.

Which brings me to my last point: When's the next Basecamp? Good question. We don't know right now, but given that our plan is to move to an annual release cycle starting next year, and that conferences are a great way to celebrate product launches, we'll do our best to make sure there's a 3D Basecamp in 2013. If you'd like to be one of the first to know when we announce it, you can add your name to our Next Basecamp Notification List.

Feel like looking at lots of pictures from the event? This album should do the trick.


Posted by Aidan Chopra, SketchUp Evangelist

Creating complete construction docs in LayOut

Tuesday, December 4, 2012

When we profiled architect Nick Sonders' amazing use of LayOut to create full sets of construction documents for his houses, we knew we were on to something big. The deluge of "TELL ME IMMEDIATELY HOW HE DID THAT" sentiment that ensued prompted us to follow up in two ways:

We invited Nick to present his workflow at our 3D Basecamp event last month. The house was packed and Nick was great, but the audio in the video recording was a little rough, so...

Our videograhper Tyson traveled to Truckee, California to record an in-depth series of videos that document Nick's process in delectable detail.

Half tutorial, half motivational speech and half religious experience (for SketchUp people, at least), the "Sonder Series" is 150% better than anything else we've created for aspiring LayOut users. If you believe in your heart that your SketchUp models deserve to live on, that CAD drafting separate 2D orthographic views is a terrible way to spend your evenings, and that there has to be a better way, this is your path forward. Pop some corn and kick back for some serious edification.

The first video is below; the other five are on online when you're ready.


Posted by Aidan Chopra, SketchUp Evangelist

SketchUp Pro Case Study: Green building design with Sefaira and SketchUp Pro

Tuesday, November 27, 2012

This post comes to us from our friends at Sefaira. In this blog, we’ll see how Booth Hansen, a nationally recognized Architecture, Planning, and Interior Design firm, uses Sefaira Concept and the Concept plugin for SketchUp Pro to incorporate green building analyses into the earliest stages of design.

Sefaira Concept + SketchUp Pro for Green Building Design
Traditionally, thermal simulation packages or energy models assess compliance at the end of the design process. Using Sefaira Concept, Booth Hansen can rapidly analyze and evaluate “what-if” scenarios at the earliest stages of design. These scenarios provide clients with the relative energy savings of various design strategies. Using the Concept plugin for SketchUp Pro, Booth Hansen ensures the accurate representation of their models during these early stage sustainability analyses. Simply, it's important that Sefaira Concept knows that a door is a door, and a window is a window; it turns out that SketchUp Pro's dynamic components are pretty good at this. Let’s look at two project examples.

Deming Place
The first step in performing early stage sustainability analysis with Sefaira Concept is to import building geometry from a SketchUp file. Sefaira Concept automatically identifies the physical elements of a model – including floors, walls, glazing, and roofs – so that the software can deliver real-time, iterative analyses that may inform design choices.

Deming Place is located mid-block in an urban context and shares party walls with neighbors on either side. Sefaira Concept initially identified the party walls as standard walls. However, modeling these as standard walls would incorrectly simulate thermal transfer to outside air.

Sefaira Concept classifies the geometry within a SketchUp model for energy analysis:  here, the distinction is only made between walls and glazings.

The Concept plugin for SketchUp allows designers to visualize Sefaira Concept’s interpretation of the model within SketchUp, make adjustments to this interpretation, or provide additional information as necessary. In this case, Booth Hansen designers chose to override the initial designations: the side walls of Deming Place were selected and changed to party walls, which more closely represented the actual building conditions.

Here, the Concept Plugin for SketchUp is used to reclassify walls that are shared with neighboring structures; now Sefaira Concept knows to treat these differently in scenario forecasting

Sefaira Concept then used the party walls to define the enclosed space earmarked for analysis. Ultimately, Booth Hansen determined there was no significant thermal transfer through these walls, under the assumption that the interior of buildings on either side are kept at roughly the same internal temperature as Deming Place.

Children’s Center at the Chicago Botanic Gardens
For the Children’s Center at the Chicago Botanic Gardens, Booth Hansen utilized a series of concentric circles to define the building’s floor plan. This design resulted in a geometrically complex roof structure at the clerestory windows.

The base SketchUp model for the Children's Center at the Chicago Botanic Gardens

To make sure that the energy analysis was accurate, Booth Hansen’s architects needed to know that Sefaira Concept had correctly identified and categorized the building’s different elements.

Sefaira Concept's initial analysis of the model: the clerestory roofs have been classified as a hybrid of wall and roof planes

Using the Concept Plugin, Booth Hansen could see that Sefaira Concept had identified the clerestory roofs as a combination of wall and roof planes. Booth Hansen corrected this initial interpretation using the Concept plugin, so that all clerestory roofs would be correctly analyzed as “roof.”

Using the Concept plugin for SketchUp, the roof geometry is correctly reclassified; the model is now ready for analysis.

Once uploaded into Sefaira Concept for analysis, Booth Hansen was able to parametrically manipulate the properties of the roof surfaces (such as R-value and construction type).

Results
In these projects, Booth Hansen was able to use limited information available in conceptual design (such as basic massings, floor plan layouts, and site location) to measure sustainability impact across their design choices. Particularly with Deming Place, Sefaira Concept and the Concept Plugin for SketchUp helped establish a best practice model for sustainable design of similar buildings.

Posted by Sam Somashekar, Sefaira
Interested to demo Sefaira Concept and the Concept plugin? Check in with Sefaira.

Free Mobile Recharge using Amulyam,Embeepay,Way2sms,ULtoo

Friday, November 23, 2012

free recharge amulyam airtel idea bsnl vodafone ultoo embeepay
Here i am going to say about free recharging sites in internet.Are you wasting money by making recharges,Then here is the time for changing that. There are many sites provides Free Recharge and many of that are fake and some them are good and we can trust.
One of the site is


Update [8-1-2013]: I noticed that I couldn't get any recharge amount from Embeepay and mcent so I have removed it from the following list. The following sites are real and we can trust because I am earning free recharge from these sites.
     There are many other sites for online recharge, some of them that i used are listed follows
    Amulyam gains popularity in India in recent two years and very popular service among Indian mobile users. Amulyam has many ways to get talktime in our wallet. They provides emails of advertisers that sends to us and each opening of the mail will get .25ps in the wallet. They provide 2-3 advertisement mails every day. When the wallet reaches Rs.10 you can make recharge. Another way for increase the earnings in the wallet is to play and create contest or quiz. Playing contest will give .25ps and creating contests make you to earn high. Create a quiz with 10 questions will get you Rs.5. For Approved questions will get 50ps per question.
    Another way is to purchase air tickets and buying things it will offer you Rs. 500 instantly. Also you can refer friends and make money. Each referral will get you Rs. 1.
    Embeepay is a Facebook Application it provides points  and when we sign up it gives 100 points. 30 points will give you 10Rs top up and 150 points will give you 50Rs Recharge.300 points will give you 100Rs
    ULtoo provides free sms and get talktime to your account by sending sms.

    Click here to get Rs.2 on your wallet instantly in amulyam

    Click here to get 100points on Embeepay instantly

    Click here to get Rs.2 on your wallet of ULtoo

    Click here to get Rs.1 on your wallet of Way2sms

    I hope this article will help you better.

    How to Change comments style on Blogger?

    Tuesday, November 20, 2012

    Style your Comments Block Blogger
    First of all i'm saying sorry to all for the delay of posting.
    This is a tutorial about how to style your comments block with effective designs.
    This is done using Simple css Scripts.
    The demo of a styled comments block is as follows.


    Click the link below to see demo
    Demo page
    What's inside this article?

    Comments Style version 1.0


    .comments .comment .comment-actions a {
    background: none repeat scroll 0 0 #FFD99E;
    border: 2px solid #FFB43D;
    border-radius: 3px 3px 3px 3px;
    color: #000000;
    font: bold 12px arial;
    margin-right: 14px;
    padding: 3px 9px;
    text-decoration: none !important;
    text-shadow: 1px 1px 0 #FFFFFF;

    }

    .comments .comment-block {

    background: none repeat scroll 0 0 #E2E2E2;
    border: 4px solid #ABABAB;
    border-radius: 3px 3px 3px 3px;
    padding: 3px 10px;

    }

    .continue a {
    background: none repeat scroll 0 0 #FFD99E;
    border: 2px solid #FFB43D;
    border-radius: 3px 3px 3px 3px;
    color: #000000 !important;
    display: inline-block !important;
    margin-top: 7px;
    padding: 3px 8px !important;
    text-decoration: none !important;
    text-shadow: 1px 1px 0 #FFFFFF;
    }
    .comment-block:hover > .comment-header {
    border-bottom: 2px solid #000;
    -moz-transition: border-color .5s ease;

    }

    .comment-header a {

    color: #000000 !important;

    }

    #comments .avatar-image-container img {
    border: 2px solid #FFFFFF !important;
    border-radius: 50px 50px 50px 50px;
    height: 57px;
    max-width: 57px;

    }

    .comments .avatar-image-container {
    border: 2px solid #FFFFFF;
    border-radius: 34px 34px 34px 34px;
    box-shadow: 1px 1px 3px #ABABAB;
    float: left;
    margin-left: -40px;
    max-height: 60px !important;
    overflow: hidden;
    width: 60px !important;
    }

    Comments Style version 2.0


    .comments .comment-block {
    background: url("https://blogger.googleusercontent.com/img/b/R29vZ2xl/AVvXsEiuo6TSYY5MslSSKU4rdXqvTtQfaV7LsnGwhLOkaGxk-TrM8qNgWYSGxQtHB5Sqh0MygcAutf3L0mpsnGt52nuhBB29ZRjRILIOSXsnw0P7CVCudYLzXgaZDY7XpTGBLDLAcK6ZNZV-lPA/s1600/bg.png") repeat scroll 0 0 transparent;
    border: 4px solid #EAEAEA;
    border-radius: 3px 3px 3px 3px;
    box-shadow: 3px 3px 0 #D6D6D6;
    margin-left: 48px;
    padding: 3px 10px;
    position: relative;
    }
    #comments .avatar-image-container img {
    border: 2px solid #FFFFFF !important;
    border-radius: 50px 50px 50px 50px;
    height: 57px;
    max-width: 57px;
    }
    .comments .avatar-image-container {
    border: 2px solid #FFFFFF;
    border-radius: 34px 34px 34px 34px;
    box-shadow: 1px 1px 3px #ABABAB;
    float: left;
    margin-left: -40px;
    max-height: 60px !important;
    overflow: hidden;
    width: 60px !important;
    }
    .comment-header {
    border-bottom: 2px solid #F1F1F1;
    }
    .comment-block:hover > .comment-header {
    -moz-transition: border-color 0.5s ease 0s;
    border-bottom: 2px solid #000000;
    }
    .comments .comment .comment-actions a {
    background: -moz-linear-gradient(center top , #EEEEEE 0%, #CCCCCC 100%) repeat scroll 0 0 transparent;
    border: 2px solid #E0E0E0;
    border-radius: 3px 3px 3px 3px;
    color: #000000;
    font: bold 12px arial;
    margin-right: 14px;
    padding: 4px 11px !important;
    text-decoration: none !important;
    text-shadow: 1px 1px 0 #FFFFFF;
    }

    Stunning models of an equally stunning town: a visit to Getaria

    Thursday, November 15, 2012

    Back in May, we announced the winners of the 2012 Model Your Town Competition, Josetxo Perez Fernandez and Pedro Domecq Aguirre, who modeled the beautiful town of Getaria, Gipuzkoa, Spain.


    Recently, a team of folks from both SketchUp and Google traveled to Getaria to celebrate Josetxo, Pedro, and Getaria’s citizens. Let’s just say Getaria has pretty much the best fish and friendliest people you’ll find anywhere in the world. The local school, Herri Iturzaeta Eskola, received $25,000 from Google, which was presented during an assembly at the school. Josetxo and Pedro led an inspiring session on how they created their models. Judging by the excitement in the room, we expect there will be some 3D wonder-kids in Getaria’s future.

    Pedro and Josetxo presenting SketchUp and Google Earth to the students of Herri Iturzaeta Eskola

    Citizens of Getaria also welcomed us at the new Cristóbal Balenciaga Museum, for a reception and tour. The museum’s collection of Spain’s most famous fashion designer is a big point of pride for Getaria, and not to be missed if you’re ever visiting Basque country.

    We congratulate Josetxo and Pedro on creating such incredibly beautiful SketchUp models. You can explore Getaria for yourself in Google Earth and then compare the 3D models to the real thing in this photo gallery of our visit.


    Posted by Allyson McDuffie & Tyson Kartchner, SketchUp Team

    Creating a plan of your SketchUp model in LayOut

    Wednesday, October 3, 2012

    Earlier this year, we shared a snapshot of how architect Nick Sonder uses SketchUp Pro and LayOut to work up construction documents. In comments on this blog and our YouTube channel, we noticed that folks wanted to learn more about the ins and outs of this process, so we tapped Paul Lee, author of “Construction Documents using SketchUp Pro & LayOut to walk through the basic process for porting SketchUp scenes to plan views in LayOut:

    Creating a plan in LayOut is a snap. In this tutorial we will take a pre-formed model, apply a Section Cut and create a Plan Scene for display in LayOut. Below is a view of a house construction model you can download from here. Once you've opened this model (or one of your own), select the Section Plane tool from the Tools menu. Use this tool to align the desired sectioned view of the model. (Remember: Hold down the shift key to maintain alignment while positioning your section cut.)
    With your model queued up, you're ready to slice and dice with the Section Plane tool
    Sectioning a SketchUp model

    Under the Camera Menu, Set the view to Parallel Projection; notice that you've now provided straight-on view for your plan. Next, under Window, select the Scenes console. (Tip: you can hide the Section Plane itself in your LayOut document by opening the Styles window in SketchUp, and editing the default style of your scene to hide the section plane).

    Now click on the “+” button and create a scene called “PLAN”. Open LayOut and access your SketchUp model by selecting File > Insert. From here, simply right-click on the SketchUp window and select Scenes: “PLAN”. Then right-click and go to Scale = 1mm:50mm. Your scaled plan is now finished in LayOut, and you're all set to start dimensioning and annotating the important details.

    Setting up your plan as a scene in prep for LayOut

    Voila: a SketchUp scene imported to LayOut

    Posted by Paul Lee, Viewsion Virtual Environments, SketchUp ATC

    This tutorial is based on techniques found in Paul's new book “Construction Documents using SketchUp Pro & LayOut” available here from SketchUcation and also on the Viewsion Authorized Training Center website.

    World Maker Faire, New York City, here we come.

    Thursday, September 27, 2012

    We always say that SketchUp is at its best when modeling real things, especially when the modeling happens before the making. The thing is, there’s no penalty for screwing up in SketchUp; heck, mastering SketchUp screw-ups might just be the best way to learn 3D modeling.

    So there’s a special place in our heart for folks out there who use SketchUp to design and make things. These are modelers who routinely demonstrate an utter disregard for screwing up. Instead, they embrace trying again, figuring it out, solving for, and sometimes just rolling the dice.

    This weekend, we’re thrilled to be trekking out to New York City for World Maker Faire. In our second year as a Maker Faire sponsor, we’re looking forward to celebrating the projects of SketchUp modelers, and learning about countless other tools that people use to make ideas real.

    World Maker Faire, here we come!

    Are you heading to Maker Faire this weekend? Whether you’ve sawed, soldered, open-sourced, or 3D-printed a project you’re proud of, we want to hear about it. Need help with a tricky SKP? With the help of our friends at MakerBot, we’ll be 3D-printing models-in-progress all weekend. Looking to meet like-minded makers? Sync up with other SketchUp modelers heading to Maker Faire. Just exploring Maker Faire for fun? Stop by the SketchUp booth and say hi; we’ll be screwing up and figuring it out all weekend.

    Posted by Mark Harrison, SketchUp Marketing

    Modeling SketchUp roofs on a click with Build Edge PLAN

    Thursday, September 13, 2012

    If you’ve ever taught someone to use SketchUp, you’ve probably drawn the basic SketchUp house and then breezed over the details when it comes to detailing the roof. The truth is that designing roofs is not always a straightforward task, even for experienced modelers.

    We’ve explored some solutions for boosting roof design productivity on this blog, and today we’re happy to share a new plugin, Build Edge PLAN, that employs a bit of BIM for quickly creating dynamic walls and roofs. Here’s a quick look at how it works, courtesy of Aaron from Build Edge:


    If you couldn’t sit still for the video, here’s the skinny: Build Edge PLAN plugin makes it easier to...

    Draw Walls: Rather than outlining walls in a 2D view, and using Push/Pull to extrude them to full height, PLAN can draw complete 3D walls based on your desired dimensions. Each wall can be input as quickly as drawing a single line.

    Edit Walls: Even if you are precise when it comes to grouping objects and creating components, modifying walls in an existing structure can be a trying process. With walls created by BuildEdge PLAN, you can move one wall, and all of the attached walls (not to mention the roof) will stretch to stay connected.

    Model Roofs: Modeling a pitched roof in 3D is not a straightforward task. Properly projecting surfaces so that they intersect each-other to form a proper roof is time consuming, and if you want to model for framing, including proper heel heights and overhang geometry can be a challenge. BuildEdge PLAN simplifies the process by generating roof geometry from a simple roof outline. Just specify the slope and heel geometry of each side of the roof, and the plugin does the heavy lifting. PLAN also lets you set properties of each roof side individually, so there is plenty of wiggle room for customization.

    Roof Creation in Build Edge PLAN: Roofs are created by outlining their profile; selecting individual sections allows for customization

    Edit Roofs: Since BuildEdge PLAN recognizes walls and roofs as they are input, you can modify the house as a whole, and move walls or change properties of a roof on the fly. This allows you to quickly change the look of the entire house or any individual properties. For instance, switching from a hip to a gable is literally a single click.

    Currently, Build Edge PLAN is only available for PC (a Mac version is in the works). The folks at Build Edge have some quick tutorials to get you going and are pretty great about helping modelers to get the most out of their plugin; give it a try, and the next time you teach someone SketchUp, don’t skimp on the roof.


    Posted by Mark Harrison, SketchUp Marketing

    SketchUp gets a warm welcome in China

    Friday, September 7, 2012

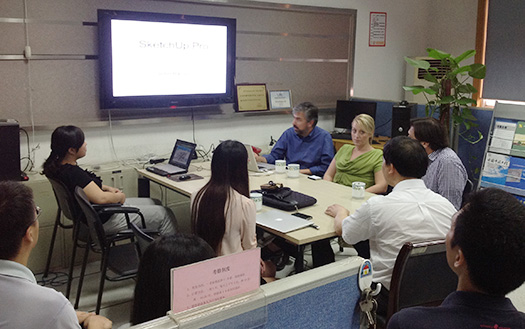
    In mid-July of this year, intrepid world travelers John, Shara and Steve headed east to join Sophie Feng (one of our newest SketchUp team members) on a mission to learn more about folks in China are using our software. Here's a travelogue that Sophie put together to describe the trip.

    When a journey begins, you generally have no idea how it’s going to end. The small talk that seems insignificant turns into a great inspiration. The strangers from another country you only knew by name become your friends, while the colleagues you just met become your family.

    In June, we talked by Skype about a trip to visit SketchUp users in China, planned it, then worked toward making it happen. Despite that, I doubt my dear colleagues knew how long it was going to be until we were sitting in a prestigious architectural firm the first day they arrived in Shanghai.

    July 9th: Shanghai EC Architectural Design & Planning Co. Ltd.

    Users presented to us how they use SketchUp in their workflow. They showed off their design skills by making a beautiful SketchUp animation for us. A local government official also was invited to join the "SketchUp Dialogue".

    John really enjoys drawing on the wall.

    July 10th: Better SketchUp, Better Design at the Shanghai Salon

    Many designers, mostly young, came to the event filled with hope. They were enthusiastic, intelligent, idealistic, and joined us from all over China (Beijing, Shanghai, Suzhou, etc.) One interior designer even came all the way from Taiwan to share his SketchUp ideas with us.

    Our users tell their stories one by one.

    We were curious as to how these young designers use SketchUp for such large projects, which are actually fairly common in China. One thing that was very important to all those at the salon: They really want to make sure that SketchUp would not change too much after the transition from Google to Trimble. One of the most impressive presentations of the day was a local developer's "BIM for SU”. One of our users developed a series of plugins for SketchUp that completed a specific BIM workflow.

    On a yacht in Huangpu River, Shanghai. From left: 王韶宁 wang shaoning, developer (Beijing); Steve Dapkus; 潘毅 Panyi, Landscape Architect; 钟凡 Zhongfan, SketchUp-BIM user (Guangzhou); John Bacus; 陈建良 Chen jianliang, interior designer; 刘新雨 Liu xingyu, Urban Planner (Beijing).

    July 10th & 11th: Wuhan

    This was our first visit to a famous Chinese university: HUST (Huazhong University of Science & Technology) is the only institution to offer a Masters degree for BIM qualification in China. Professor Luo (the College President) told us that there were 8,000 construction sites in Wuhan last year. There's no doubt that BIM has a great opportunity in China, as does SketchUp’s role in a BIM workflow. My colleagues John, Steve and Shara found themselves feeling hopeful at this leg of the trip, against all odds due to jet lag, 43 degree Celcius heat and 90% humidity.


    As the first national research Lab in China, HUST is glad to get new ideas from SketchUp as a BIM tool. In the afternoon, another interesting salon was waiting for us.

    Our new friends shared lots of interesting thoughts with us. Shara looks better after she's had some coffee.

    July 13th: Guangzhou

    On our way to Guangzhou University, The U-BIM Company prepared a BIM and SketchUp conference for end users in Guangzhou. John added that “Maybe SketchUp is BIM for everyone” in his slides, and added that “SketchUp can do more than just visual representations." digitalarch, a SketchUp user in Taiwan, had explained this notion for us at the Shanghai salon.

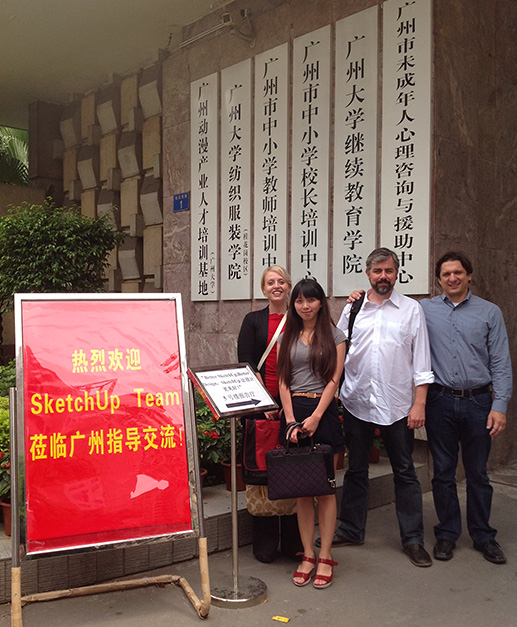
    We look fresh today. We are standing at the entrance of Guangzhou University.

    SketchUp users always have a way of expressing their thoughts; a designer who is also a professional rapper told us he would write a Chinese rap for SketchUp. What a brilliant idea! I know it's been a long trip—10 days, 3 different cities, and my American colleagues were all anxious to get back to their sweet families. Let’s end our long trip with a poem written by Chen ling 陈玲, a young Shanghai landscape designer. When he told us that he believes that SketchUp changed his life and career, I saw his eyes light up.

    Chen ling is a very talented designer. Look at the scale of these models!

    Poem: Gratitude for SketchUp by Chen ling 陈玲

    Translation:

    Have been working in designing after leaving school
    So lucky I met you—SketchUp in October 2004
    You change my career
    Because of you, I seize more opportunities.
    Because of you, I am one of the youngest writers who can publish the book about you.
    You give me so much, so much wonderfulness
    You bring me so much, so much glory
    Thanks a lot

    Posted by Sophie Feng, SketchUp China Team

    A brand new brand for SketchUp

    Tuesday, August 28, 2012

    Glance at the masthead of this blog and you'll know something's up. Our new graphic identity is only the most obvious of the changes we've made in SketchUp 8 M4. It's unusual for us to do four maintenance releases between major versions, but then, it's been a bit of an unusual year, hasn't it?

    Our move to Trimble gave us an opportunity (and an imperative) to finally build a proper graphic identity for SketchUp. In many ways, this was one of my favorite short-term benefits of the acquisition; it always irked me that our tool, which is so good at making pictures, had a logo that consisted of its name typed out in a particular font. Blech.

    Devoted students of SketchUp history (sketchupologists?) will recall that until March of 2006, our logo looked like this:

    The most distinctive element of our original logo was its big, red U.

    This kind of logo is known as a logotype or wordmark, meaning that there's no symbol attached to the word; the word is the logo. The trouble with using a logotype for a piece of software is that, most of the time, individual programs on your computer are represented by application icons that live on your desktop or in a strip along the bottom of your screen. SketchUp's icons have looked like this over the years:

    SketchUp's application icons have, in my opinion, gotten progressively less good over the years. The last one (on the right) only appeared on Google's More > Even more page. None of these icons were ever really used as product logos.

    The Google years brought several logos as we responded to successive top-down branding directives. None were particularly inspired, and none solved the we-need-an-icon problem, either.

    Mostly SketchUp, then mostly Google, then side by side.

    As we kicked off our new branding effort in June, we were determined to kill two birds with one stone: We would design a symbol (some people call it a "mark") that would do double duty as our product icon.

    For the mark/icon itself, we were looking for a form that communicated a number of things. Less important were notions of informality and simplicity, though we obviously didn't want our symbol to convey stodginess or head-banging complexity. We focused on the notions of three-dimensionality, dynamism (movement) and perspective.

    When we saw the sketch of the shape that would eventually become our icon, we knew we were on the right track. It's derived from a cube—which is the go-to symbol of 3D for apps like ours—but it isn't really a cube at all. The implied stairs or levels are an apt representation of our roots in architecture and other construction disciplines.

    If you look closely, you'll notice the chevrons formed by the top surfaces even point "Up" in a nod to our signature tool.

    Whereas application icons are often very colorful—with lots of fine detail, gradients and shading—corporate marks need to be much more flexible. They need to be able to scale up and down without looking smudgy or oafish; they need to be able to printed in a single color when necessary; they need to be readable on black, white, colored and photographic backgrounds; they need to be able to be reversed into white sometimes. The best logos look good no matter where you use them.

    We decided it was best to stick to a single color. But which one? SketchUp's hue has shifted slightly over the years, but it's always been a flavor of red. As we looked at ruby and garnet, crimson and cadmium, burgundy and brick, we kept coming back to a desire for SketchUp's red to be as simple and positive as the rest of our brand. Our choice, Pantone 1795, is saturated, definitely not brown or purple, and stop-sign-visible at a thousand paces. I cheer up whenever I see it.

    SketchUp Red is Pantone 1795 (a.k.a #e72b2d)

    We chose a typeface called Whitney for the word "SketchUp". On the Comic Sans-to-Baskerville continuum of font gravitas, Whitney is friendly, professional and clean. Just like us, we think. To uniquify things a bit, we tweaked the ascenders and descenders to match the angles in our symbol. Setting them next to each other, we have the makings of the world's greatest t-shirt:

    Our new typeface is Whitney.

    For the rest of the SketchUp Pro family of applications, we derived icons from the SketchUp symbol. LayOut is represented by an orthographic top view of the stair-step shape. Style Builder is an outline of the mark, rendered with stylized edges. All three icons are SketchUp Red, which ties them together and sets them apart.

    Did you notice the "L" in the LayOut icon?

    Some of you are probably wondering why we didn’t just wait until SketchUp 9 to change this stuff. The answer is actually pretty simple. With the deadline looming on purging the old Google SketchUp logo from our product, we had three choices: lop off the first word and hobble along without a real graphic identity; come up with an interim solution; or go through the difficult but worthwhile process of solving the problem once and for all. The first option was totally unsatisfying, the second caused more issues than it solved, and the third offered us the opportunity to make a fresh start. It was an easy decision.

    And because this is a full-fledged maintenance release...

    ...we continue to squash bugs and make SketchUp hum along as best we can. Mosey on over to the SketchUp 8 M4 Release Notes page to see a list of everything that’s better now.

    3D Basecamp 2012: Registration Opens Tomorrow!

    Monday, August 27, 2012

    3D Basecamp is the world’s premier gathering of SketchUp people. Part user conference, part pep rally, this year’s edition is set to take place in our hometown of Boulder, Colorado on October 15th, 16th and 17th.


    Registration opens Tuesday, August 28th at 10:00 AM MDT (GMT -6:00)

    With fewer than 150 spots available, we expect Basecamp to fill up quickly. If you're planning to join us, might I suggest setting an alarm on your phone for when registration opens. Be there or be cube! (Because a cube is a square in 3D. Har har!)

    To register, and to learn all about Basecamp, please visit our event website:


    Good luck, and see you in Boulder!

    Posted by Aidan Chopra, SketchUp Evangelist

    SketchUp Pro Case Study: 10K Design

    Thursday, August 9, 2012

    10K Design is a UK-based design firm led by James Horner. The firm does a bit of everything -- even web design and backend web development -- but they specialize in building design and 3D modeling.  Recently, we recently spoke with James about his firm and its work with SketchUp Pro. Here’s what he had to say:

    At 10K Design, we offer high quality design services to both the public and professionals. We have architects who design bespoke building projects, produce drawing packages for Planning & Building Regs approval, and help with every stage of development across all sorts of building projects. Our portfolio even includes design work for a house that featured on an episode of Channel Four's Grand Designs.
    Draft model of the Sugar Cube House

    We also offer general 3D modelling for producing renderings, animations and fully interactive models both as part of our architectural projects and also as a separate service. SketchUp Pro is a major part of how we design and it often empowers our clients to get their hands dirty by downloading models, exploring, and trying out layouts or different types of furniture.

    Detail of One Mayfair produced for Partytecture

    Perspective view of orangery model

    10K Design uses SketchUp Pro on nearly all of our projects, particularly in the early stages. We also use it to work out details at the construction stage, both as a design and communication tool. Our workflow normally involves obtaining an Ordnance Survey or site survey plans in DWG or DXF format; we use these as the basis for trying out some ideas within CAD. We try to boil these ideas into a series of polylines that can be easily transformed into faces with the minimum number of edges when imported into SketchUp Pro. Once imported, we push/pull objects and we develop or download required components, building the model into a complex and highly accurate representation of the space.

    Ground floor layout of 10K Design Ecohouse
    Aerial perspective shots of 10K Design Ecohouse

    We then let our architectural clients download a copy of the model so that they can play around with our ideas on their own copy of SketchUp - we actively want their participation so that they have real ownership over the project. After client collaboration, the model is then used for developing elevations and sections, and we often use it as the basis for working up construction plans in other CAD or BIM software.

    Sections cut through the 10K Design Ecohouse

    Rendered elevations of the 10K Design Ecohouse
    Viewport stills from Ecohouse animation

    Some of our clients, such as product manufacturers or land developers are looking for a model that can be used in presentations to secure funding for a project. Impressive visual information is usually paramount to making a good presentation, so it’s important that we can also prepare our models for quoting, funding rounds, and competitions. SketchUp Pro is the only software we have found that offers a cost-effective solution for doing this. It allows us to quickly produce an interactive 3D model with a high level of interactivity via scenes, clever layering, or components. The beauty of being able to create a quick model is that it can have endless uses: animations, still renderings, or orthographic drawings such as elevations and sections.

    Rendering of the Sesame Access retractable stair platform lift

    Time and time again, our clients have found that our SketchUp modelling service is a great, cost-effective way of getting exactly what they need. From manufacturing companies looking for a new method of selling their product to self-builders looking to visualise their design, SketchUp Pro is key to our service.


    Posted by James Horner, 10K Design