Here are a few things I threw together with SketchUp models and clip masks:
Cut Away Views
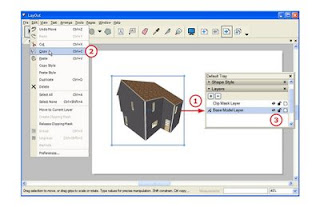
- To stack identical model windows, use the copy - paste method. The pasted model will be placed in the exact page location as the first model and on top.
- When creating cut away views or vignettes, use LayOut Layers to organize the stacked models.
- Place the "base" model on an underlying layer.
- "Copy" the model.
- Lock the layer and turn off the visibility so that this instance of the model does not interfere with the design of the clip mask.
- Activate a layer above the locked layer. This is where you will create your clip mask.
- Select the "Paste" function. This will place a model instance used in your clip mask.
- Maintaining this model in place, create your clip mask.
- After you have created your clip mask, turn on the base layer visibility.

- Finished!
- If you want the shape of the clip mask to follow line work in the model, you can change the model rendering to Vector. This will allow you to snap to and trace along the model's edges and endpoints. You can then switch it back to Raster mode and set the clip mask.


0 comments:
Post a Comment
please put you comment to tips and tricks 2013