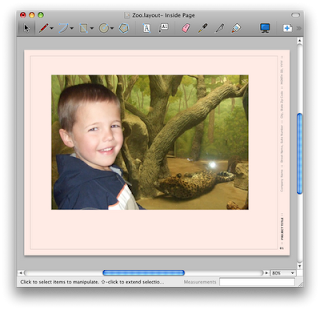
- Import an image into LayOut.
In the File menu, select the Insert… item.
Then, when prompted, navigate to the file you’d like to insert. Place it on the page roughly where you want it to be, but don’t worry too much about scaling and positioning yet. I typically put off adjusting the image too much until the clipping mask has been applied. Later on, I can use the clipped boundary for aligning the clipped image with other content on the page.
- Draw a clipping shape.
Next, draw a shape for clipping, our image. Any shape can be used, but a rectangle is sufficient to begin with. Select the Rectangle tool from the toolbar and draw a rectangle over the region we would like to keep. In my image below, I want to trim off the little girl’s shoulder in the bottom right corner and remove the map from the boy’s hand. To help me make sure I’m keeping the important parts of the image, I like to make the fill of my clipping shape about 50% opaque so I can see the image underneath.

- Create a clipping mask.
Once you have the rectangle in the right location, you're ready to make it a clipping mask. First, select both the image and the clipping rectangle. Now, in the Edit menu, select Create Clipping Mask.
 Voilà, a cropped image.
Sometimes, you won't get the clipping mask right the first time. Fortunately, the clipping mask does not permanently alter your image. Double-click on the clipped image and you will see both the clipping mask and the image appear in the screen. Both can be scaled, rotated, or moved. When you click outside the image and the mask, the image will be clipped again. If you change our mind completely about clipping, turn if off altogether. Go to the Edit menu and select Release Clipping Mask.
- Scale and position the cropped image.
Manipulation of the new, clipped image is the same as the image before the clip, except that the manipulation grips now conform to the cropped image boundary. This will help you scale and line up the image with other content on the page.
- Other cool stuff.
Clipping masks will preserve the stroke style and color of the original image. Try adding a crazy dash pattern and color to the image and see what happens when you clip it. Also, we don’t have to restrict ourselves to rectangles. Any single shape can be used as a clipping mask. In the examples blow, I used rounded rectangles and paths as clipping masks.

- Try it with a Google SketchUp model.
In addition to images, clipping masks can also be applied to SketchUp models. Just as with the images, the mask doesn’t permanently alter your model, but it does let you hide some content that might be unimportant for your page. For example, in my model of a park bench, I left a person in the model to show scale. However, in my LayOut document, I can quickly remove the person using a clipping mask, as shown below.

LayOut clipping masks are a simple feature than can produce powerful results - you can hide unwanted geometry from your model or crop a photograph. Once you use them, you’ll find you can’t live without them.
0 comments:
Post a Comment
please put you comment to tips and tricks 2013